
MyRide bike setup.
To get the most out of your MyRide session, you must check your bike fitting and duplicate your road bike set-up as closely as possible. Many people end up looking like they are riding Dutch shoppers.
The most common problem is the seat is too far forward. People doing spin classes tend to sit too far forward, making the classes easier. The further forward you are, the easier it is to get the pedal over the top dead centre. The bikes tend to have been left in this position when you arrive.
Although intended for road bikes rather than indoor bikes, the article below, written by Richard Cunningham and published by www.pinkbike.com, explains how to measure your bike and set up your indoor one.
Regular travellers who take their bikes and those who have had to borrow or hire a bike will appreciate that knowing your basic measurements makes life easier. Knowing your saddle height and the distance from the handlebar to the saddle saves a lot of setup time and prevents some mid-ride frustration. Pinkbike covers six necessary measurements that every rider should memorise (or keep handy) that will make it possible to set up a correct-sized bike to fit your body and riding style.
Use these measurements to get your bike perfect after shipping or to adjust an unfamiliar bike to fit you as closely as possible. Remember that small geometry and component spec differences can significantly change your position on a different bike. In this situation, Pinkbike's setup guides will get you close to optimum in the shortest amount of time. If you require perfection to ride a borrowed bike for one day, don't expect your friends to circle in the parking lot for an hour waiting for Mister Fuss Butt. Consult a psychotherapist and a bike-fit professional.

What you'll need:
Measuring tape.
A Sharpie or other permanent marking pen.
Sturdy writing paper that will stand the test of time in your wallet.
Your personal bike, set up exactly how you like it (you'll be measuring this).
Positive, winning attitude
Step one:
Get a pen and paper ready and find a place where you can prop your bike up on level ground. The level ground part is essential.
Step two:
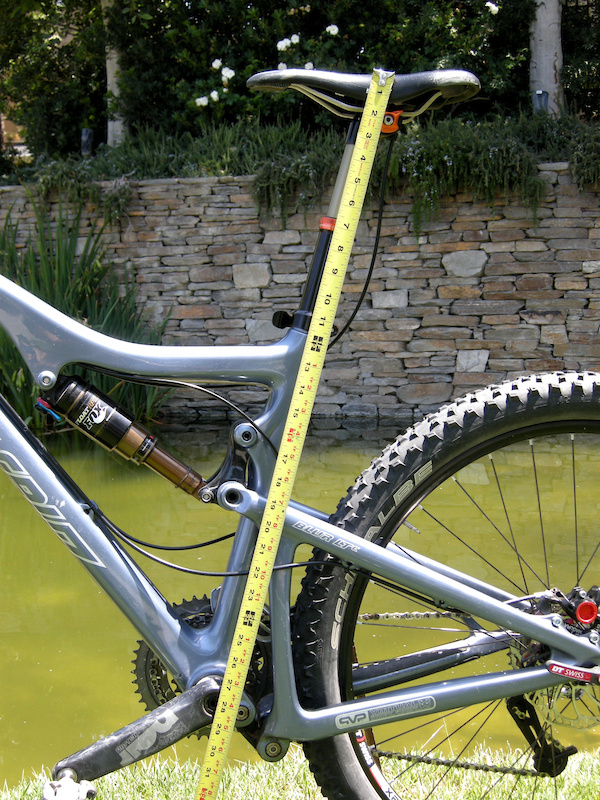
Measure the distance from the imaginary centre of the bottom bracket axle to the centre of the top of the saddle. You will have to guess where the middle of the saddle is or pick the point where an imaginary line through the centre of the seat post intersects the top of the saddle. Write this down.

Step three:
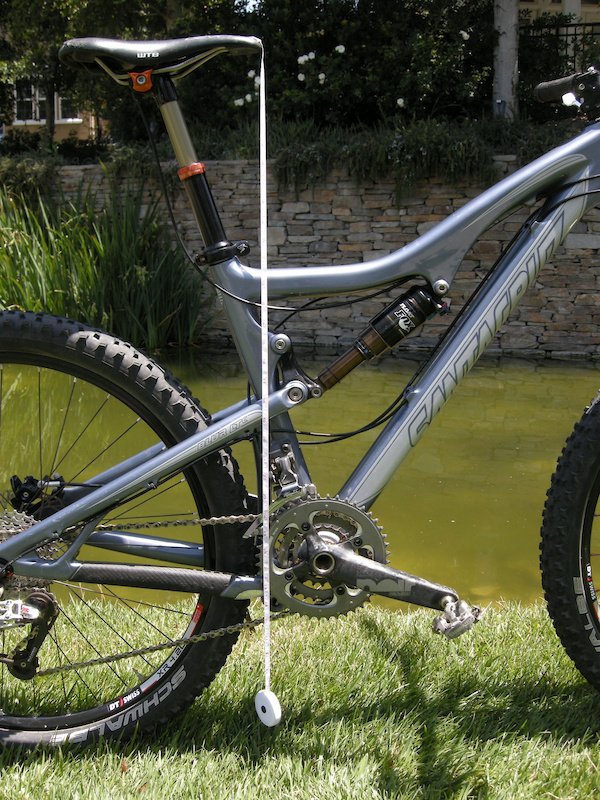
Measure your saddle setback from the bottom bracket centre to compensate for different seat tube angles. Use the measuring tape as a plumb line from the tip of the saddle. Mark the crankset with a Sharpie where the edge of the tape passes behind the bottom bracket axle, and then measure the distance horizontally from the mark to the centre of the bottom bracket - write this down. First, set your proper seat height, and then use this measurement to establish if the saddle needs to be moved fore or aft on the seat post. I would not recommend worrying about this unless you plan to race XC or ride the trail for extended distances.

Step four:
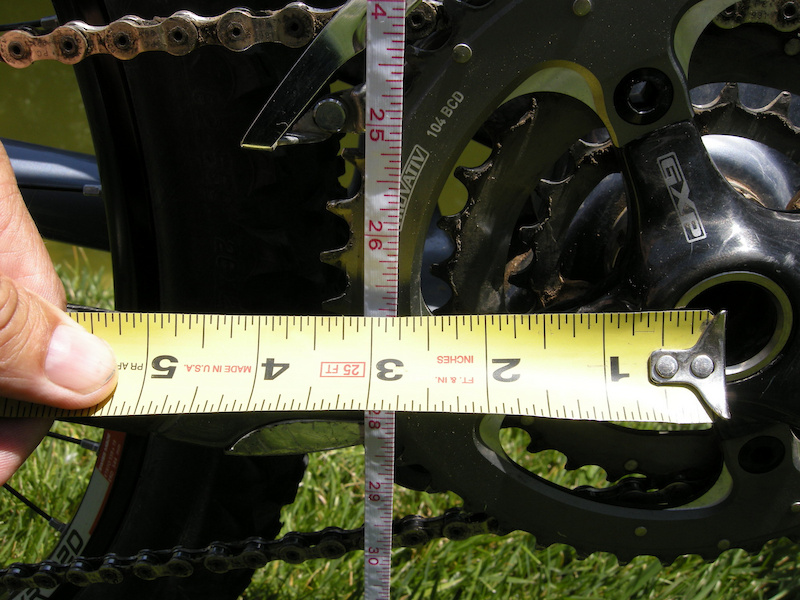
Measure the distance between the nose of the saddle and the centre of the handlebar where it passes through the stem and jot it down. In most cases, you won't be able to change your stem, so try to slide the saddle on the seat post to get this distance as close as possible. Your bike will steer and handle better if you get this measurement right, and in most cases, it's better to abandon the step-three measurement in favour of step four.